Quick Navigation
This article outlines how to add an extra field to your Store Locator. Extra fields are little blurbs of information that you can add to your store locations.
To illustrate, imagine you want to show which stores are "Cash Only" versus those that accept "Card Only." We’ll use this example to show you how to display these unique details on your map.
Adding Extra Fields
1. From the Shopify admin, select Apps.
2. Select Store Locator.
3. Select Settings.
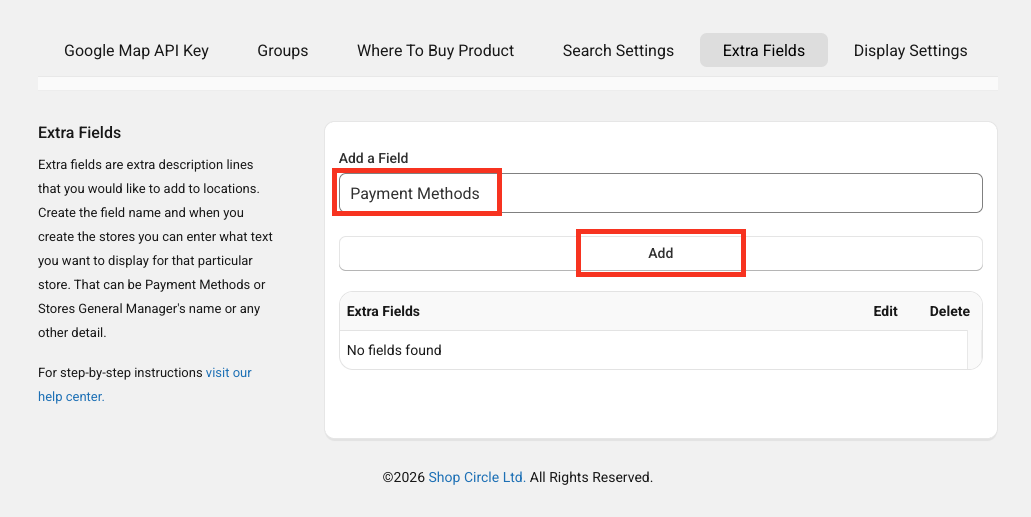
4. Select Extra Fields.
5. Enter an "Payment Methods" and select Add.
6.The new "Pet Friendly" filter is added to the filter list.
7. Save changes.
8. Repeat steps 5-6 until you have added all of your desired extra fields.
Adding Extra Fields Via Location Pages
The same action can be done on individual store location pages during creation or editing. Bare in mind that gettin to store location pages is presented in the Add and Edit Store Location article.
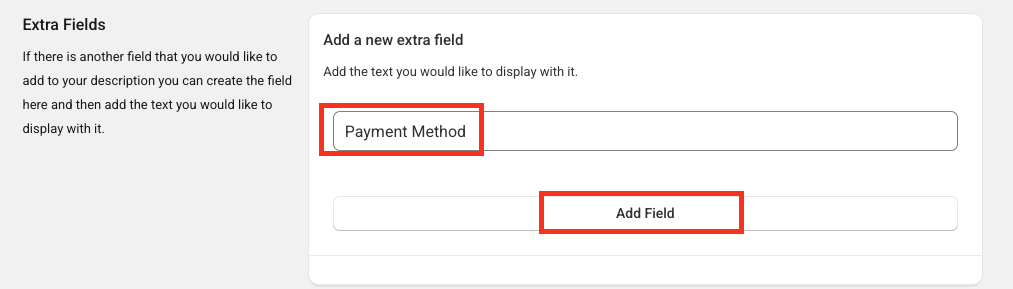
1. Select Add a New Extra Field text box.
2. Enter "Payment Methods" name and select Add Field.
3. Save changes.
Editing & Deleting Extra Fields
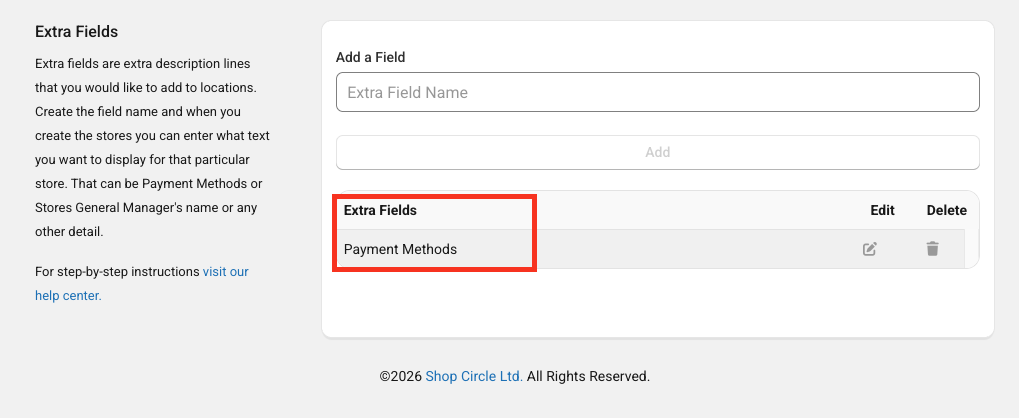
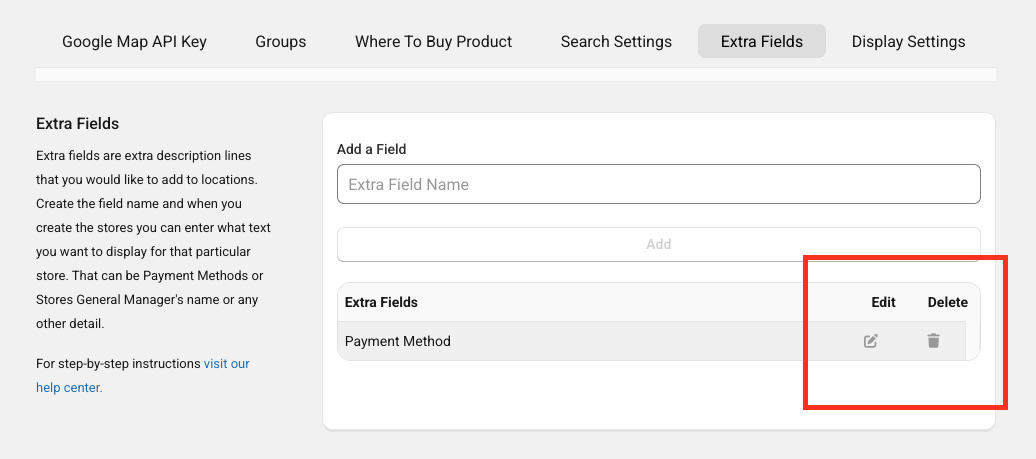
Each extra field is managed independently on the Extra Fields page.
If you want to edit or delete it, please use the buttons below and then follow the intuitive steps to change the extra filter name or delete it, before saving changes.
Adding Info To Extra Fields
All extra field information is added on individual store location pages, during creation or editing.
Getting to store location pages is presented in the Add and Edit Store Location article.
1. Scroll down and find the Extra Fields section.
2. Click on the text box for the extra field and enter "Cash Only" for example.
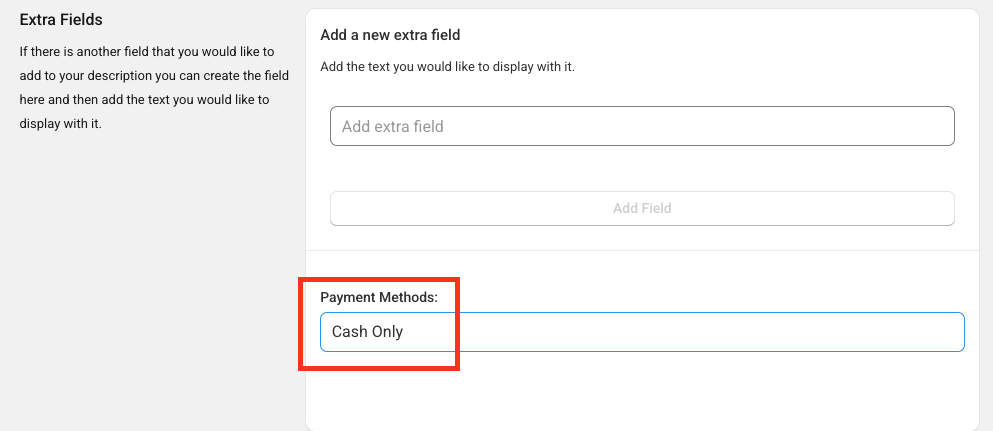
3. Save changes.
Important Note
If no information is added, no changes will be made on the location cards your users get once they click on a specific map pin.
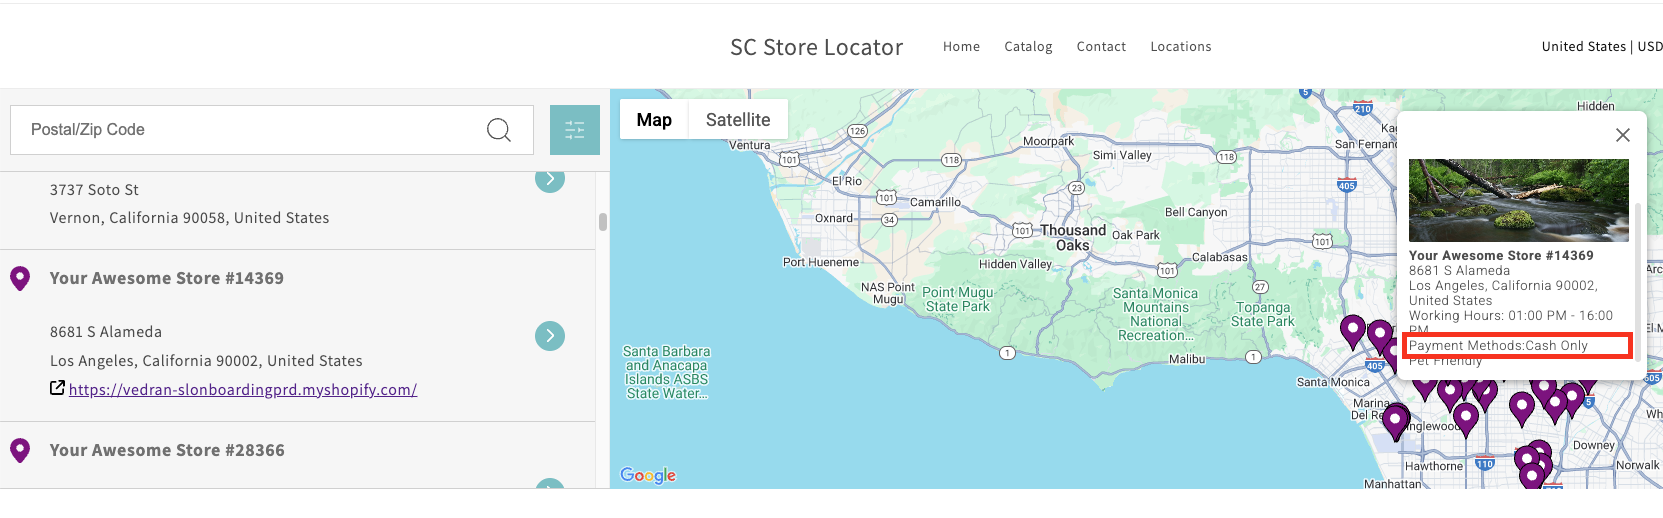
Storefront Example
Let’s stick to our example where you wanted to reflect if locations are cash only.
Let’s assume you:
1. Added the Payment Method extra field following steps in the Adding Extra Fields section.
2. Then added info to the newly created extra field as described in the Adding Info To Extra Fields section.
Then your customers will be able to:
1. Observe extra field information once they click on the map pins.
Current Limitations
We are working intensively on improving our App. However, we do have certain limitations. Currently, you cannot...
- Limit search results based on extra fields.
- Hide extra fields from the list on the Search Settings page, you can only delete them.
- Assign multiple store locations to specific extra fields in bulk on the Extra Fields page.
- Edit or delete extra fields in bulk on the Extra Fields page.
Contact Us
- Reach out to our Support Staff, or use our live chat if you have any obstacles.
- Schedule a call with an expert to help you set up or customize the app.
Was this article helpful?
That’s Great!
Thank you for your feedback
Sorry! We couldn't be helpful
Thank you for your feedback
Feedback sent
We appreciate your effort and will try to fix the article