If customers are missing mandatory choices or getting stuck at checkout because a required field isn't obvious, follow these steps to make required selections clear on your storefront.
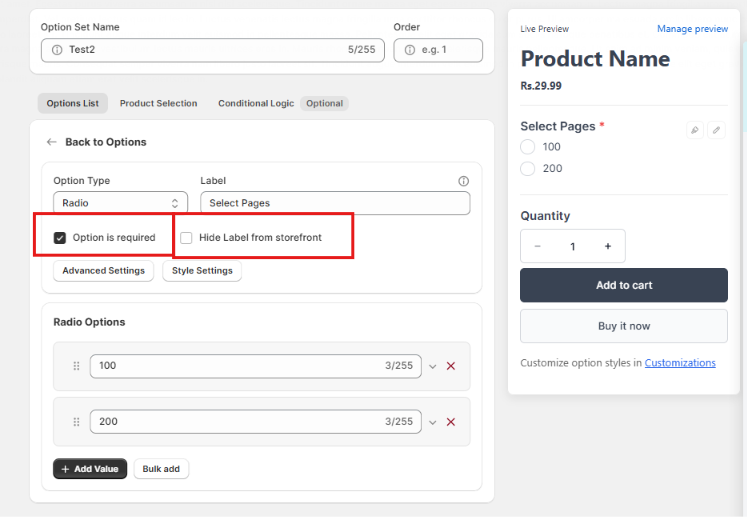
Step 1: Unhide the Option Label (Restores the Required Asterisk *)
Required field validation automatically displays a visual asterisk (*) next to the option title—but only if the field label is visible.
Go to Option Sets in the app dashboard.
Open the target option set and click the required option.
Uncheck "Hide label from storefront".
Click Save in the top contextual bar.
This immediately displays the label along with the red asterisk (
*) so shoppers know input is mandatory.
Step 2: Make the Option Label/Title Descriptive
Rename the option label so customers instantly understand what choice is expected before adding to cart.
Confusing Title:
TextClear Title:
Custom Engraving Text (Required)
Step 3: Add Placeholder Text (For Text Inputs)
Guide customer input directly inside the text box:
Add instructional placeholder text such as "Type your name or monogram here (Required)..." to make the field immediately recognizable.
Was this article helpful?
That’s Great!
Thank you for your feedback
Sorry! We couldn't be helpful
Thank you for your feedback
Feedback sent
We appreciate your effort and will try to fix the article