Let's dig into the steps needed to create an option.
After going through the steps needed in the Option Groups, we come across creating an option as we can see below.
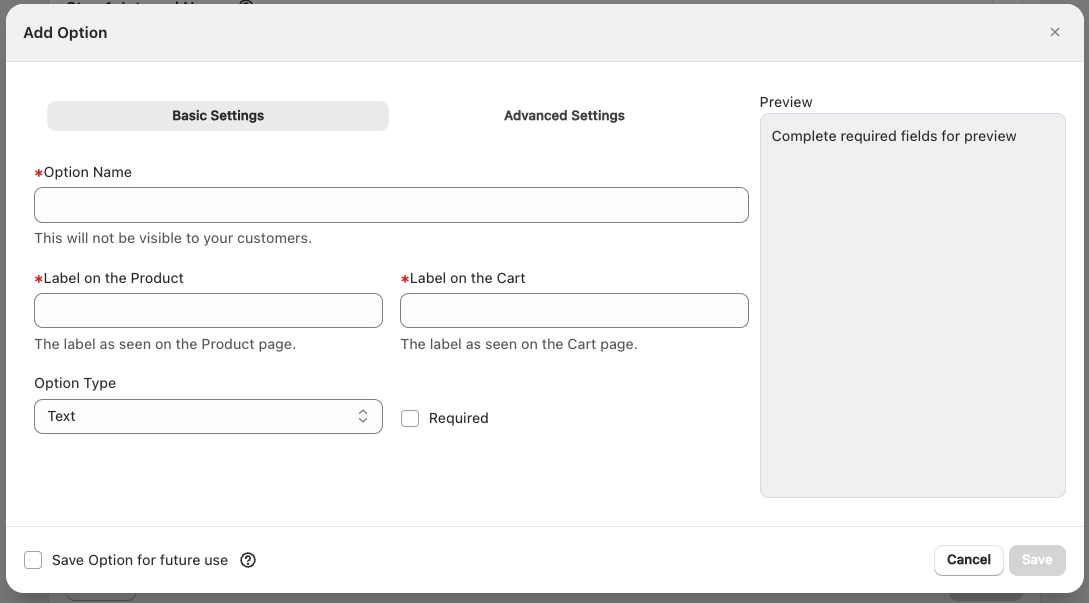
- Option Name: This will be the internal name of this option that you will see and can use for your reference. (Not visible to customers.
- Label on the Product: This will be the public name of the option, meaning this is the title of the option that the customers will see on the product page.
- Label on the Cart: You can choose to have a different name for the option in the cart page, so that it matches the cart.
This next part is what decides what type of option you are going to create.
With the app you can create 10 different types of options.
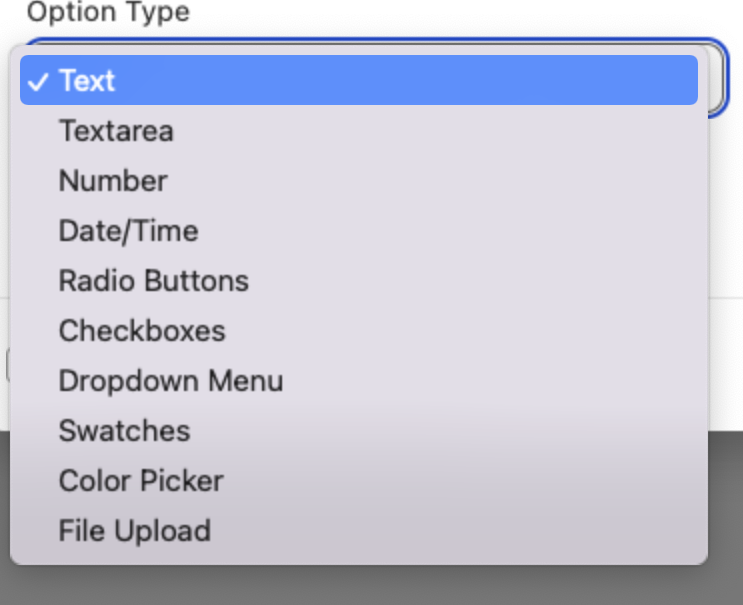
- Text: Means that your customer can add text.
- TextArea: Longer text
- Number: add digits
- Date/Time: use a picker
- Radio Buttons: Add round buttons
- Checkboxes:
Was this article helpful?
That’s Great!
Thank you for your feedback
Sorry! We couldn't be helpful
Thank you for your feedback
Feedback sent
We appreciate your effort and will try to fix the article