Quick Navigation
Store Locator still creates its own proxy page that has to be included in your store's navigation. You can always inspect it by following these steps.
1. From the Shopify Admin, select Apps.
2. Select Store Locator.
3. Select Settings.
3. Select Display Settings.
4. Scroll down until you get to Search Settings.
5. Click on the URL.

Important Note
- The initial URL naming is always depending on the name of your Shopify store. You can change it by following these steps.
- Bare in mind that the map can now also be easily displayed almost anywhere in your theme using Shopify's new App Block functionality.
- All steps below are optional. However, we recommend them if you want to present your SC Store Locator the best way possible and in accordance with your overall branding.
Step 1: Adding Proxy Page To Navigation
Now let's say you want to add the Proxy Page to your Main Menu, and create the Locations tab.
1. Follow the steps above and copy the URL for your Proxy Page.
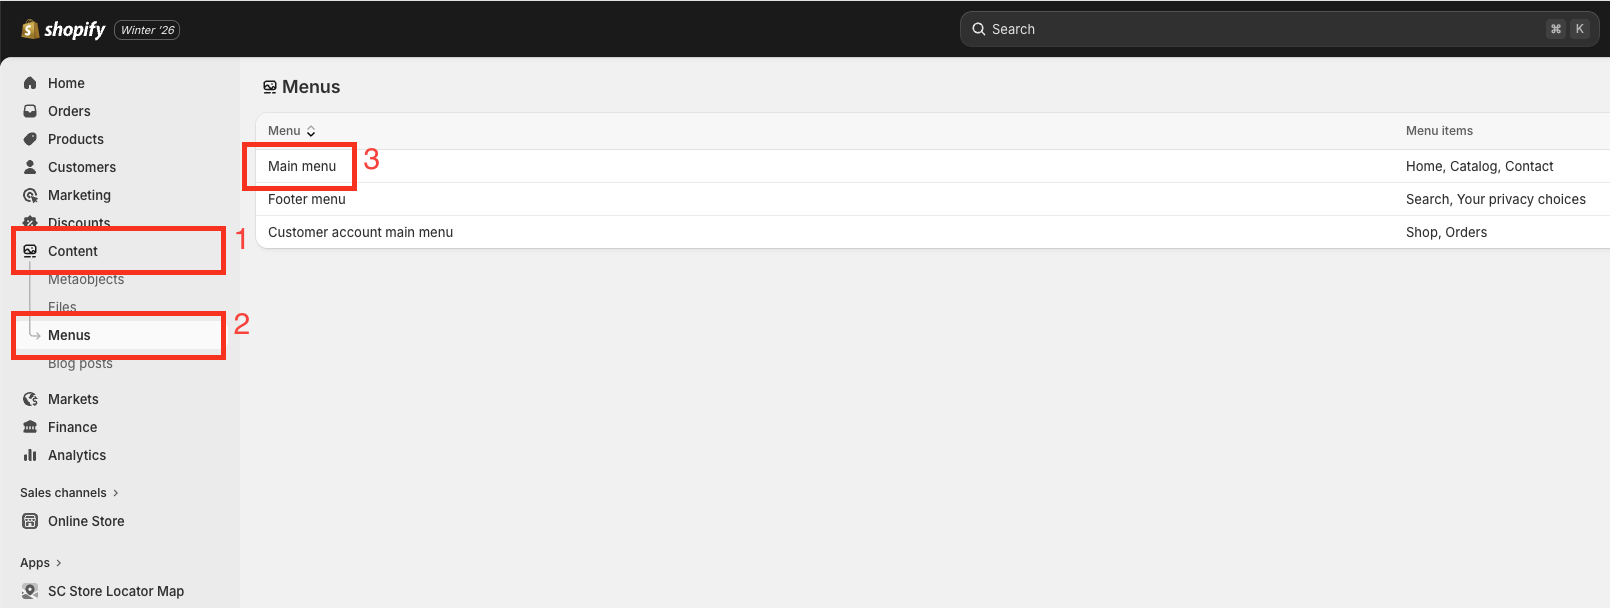
2. From the Shopify Admin, select Content.
2. Select Menus.
3. Select Main Menu.
4. Select Add Menu Item.
5. Add Locations in the Label field and paste the URL in the Link field.
6. Select Save.
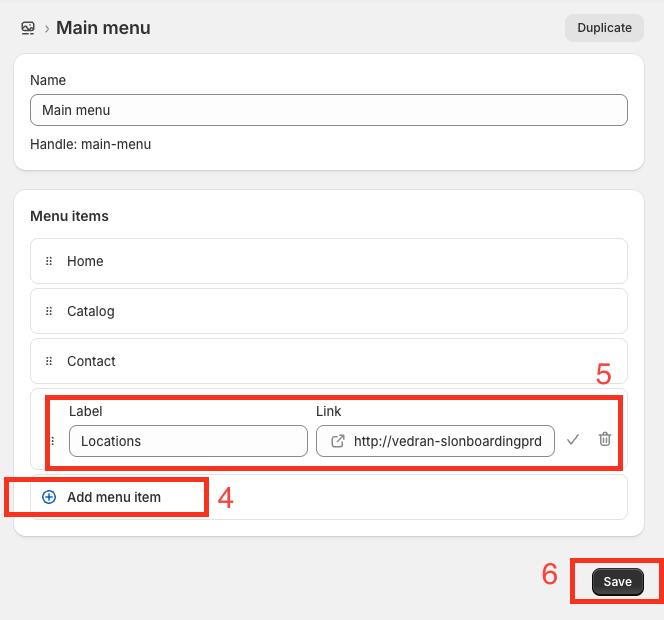
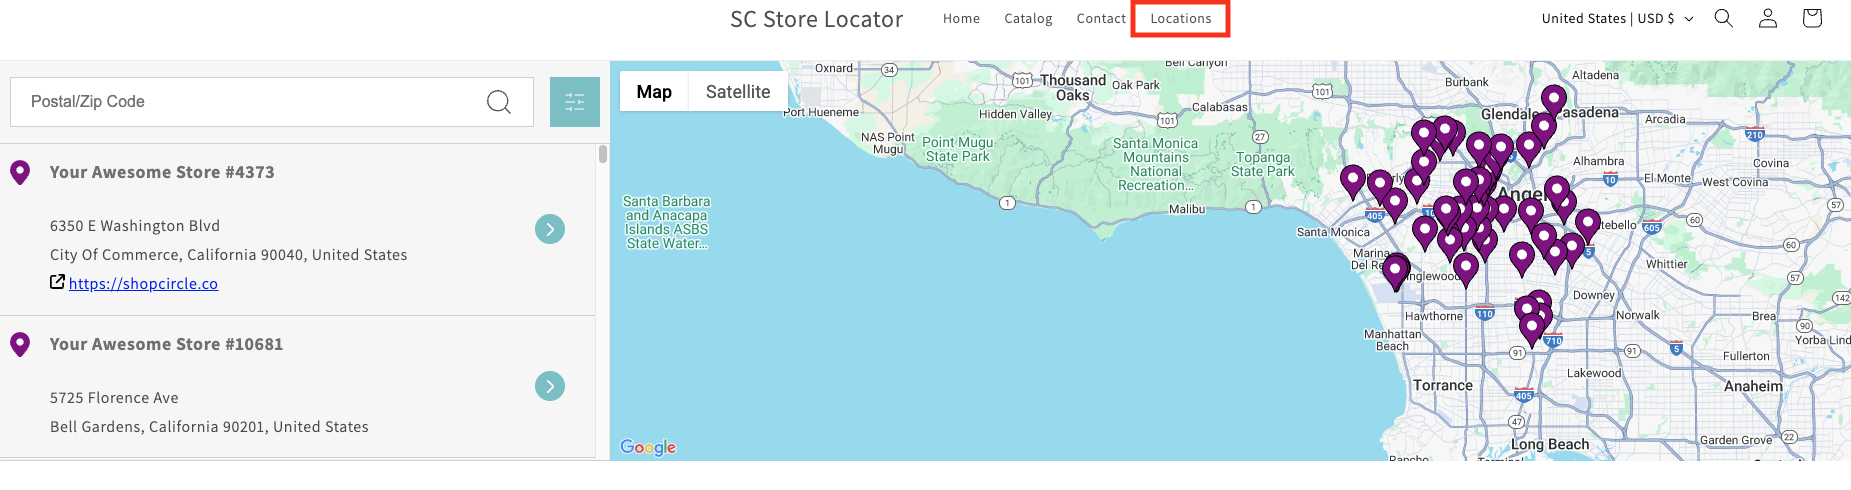
7. Your Proxy Page is now set as a separate tab.
Important Note
Website can be added to the location list on your Proxy Page (only!) on the Display Settings page. Check out the screenshot below to see what your customers will observe if you chose to set it up.
Step 2: Changing the Proxy Page URL
Now let's say you are not happy with the way your URL looks. You want it to match your overall branding.
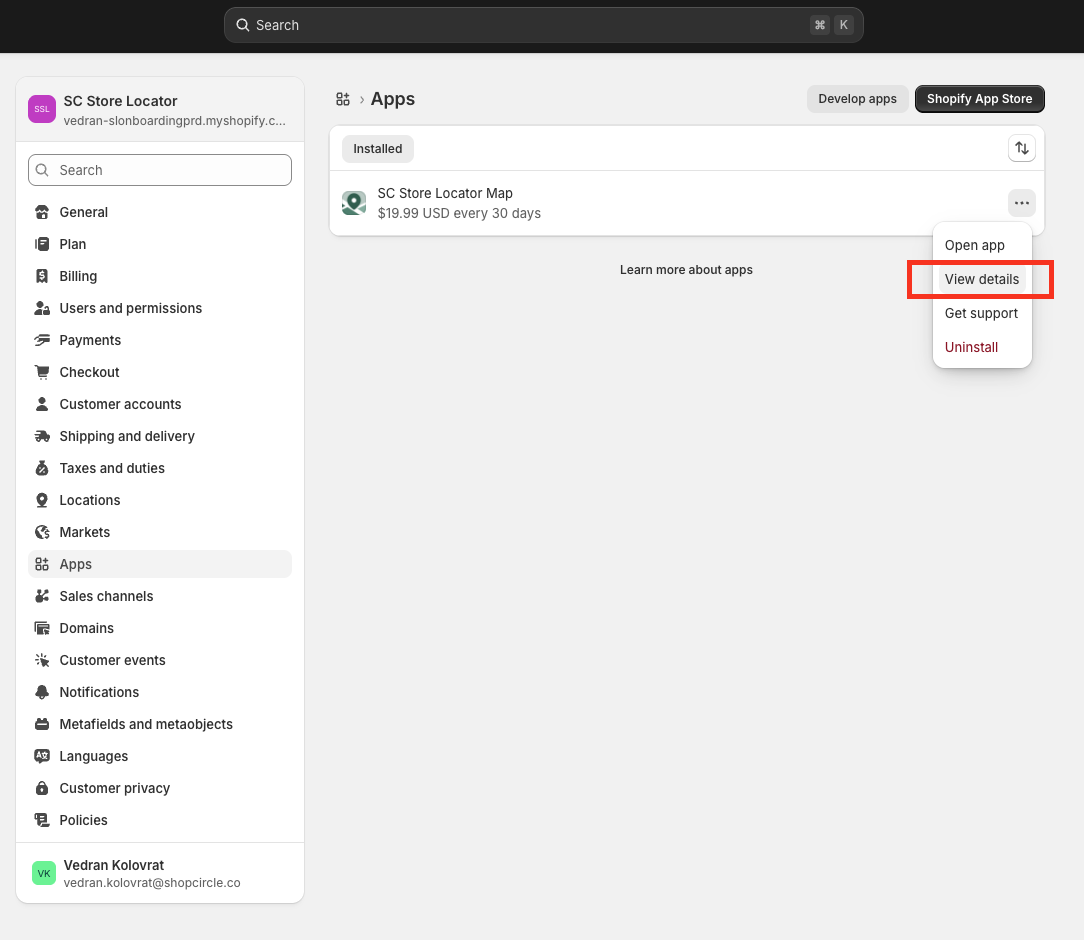
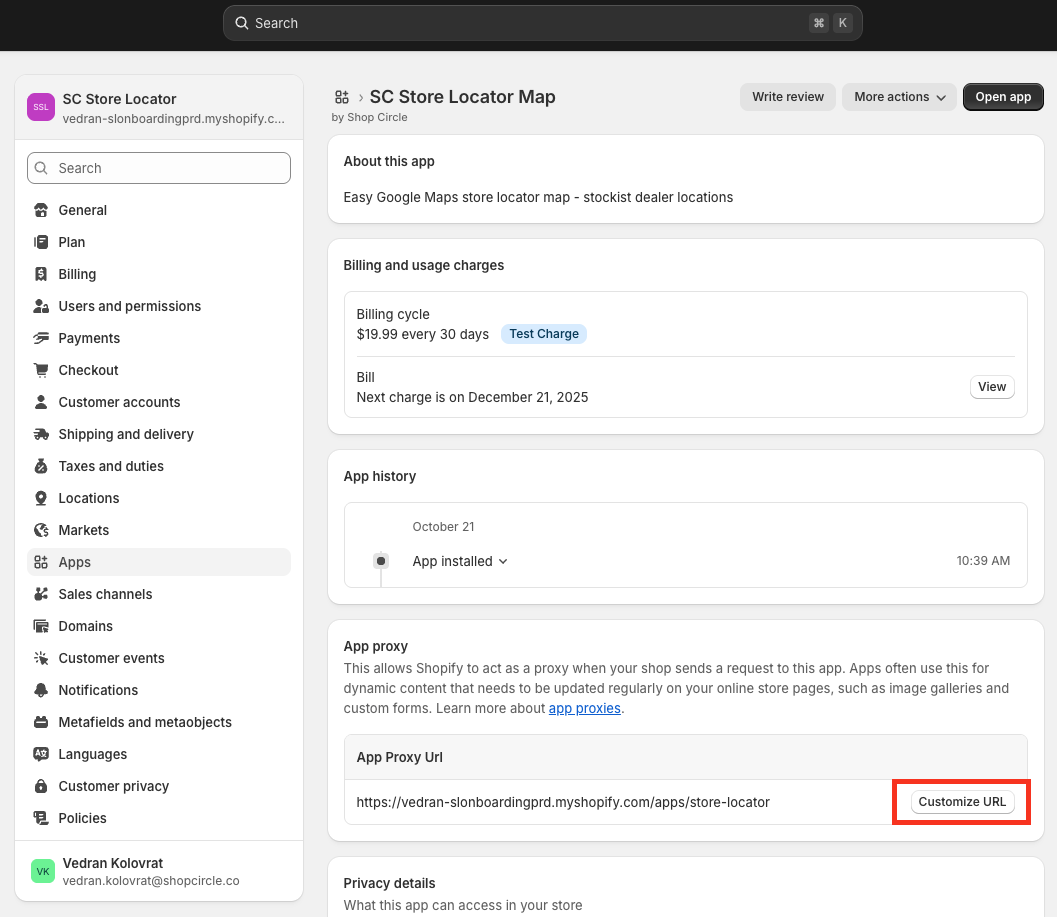
1. From the Shopify Admin, select Apps.
2. Select App Settings.
 3. Select the three dot button and then View Details.
4. In the App Proxy section, select Customize URL.
5. Select the URL you want to be displayed.
6. Enter an ending for the URL.
7. Select Save.
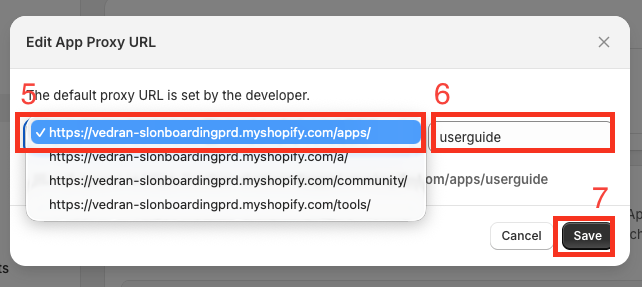
8. Your new URL is reflected.

Important Note
Bare in mind that the Proxy Page URL in Display Settings will not be changed. Use View Your Store in Themes editor to inspect your map. This is a current limitation, and we are working on improving it.
Step 3: HTML & CSS Customization
The same principles apply to both the page header and footer. For the purpose of this example we will be using the page header.
1. Follow the steps from the first section to find the Display Settings [link] page.
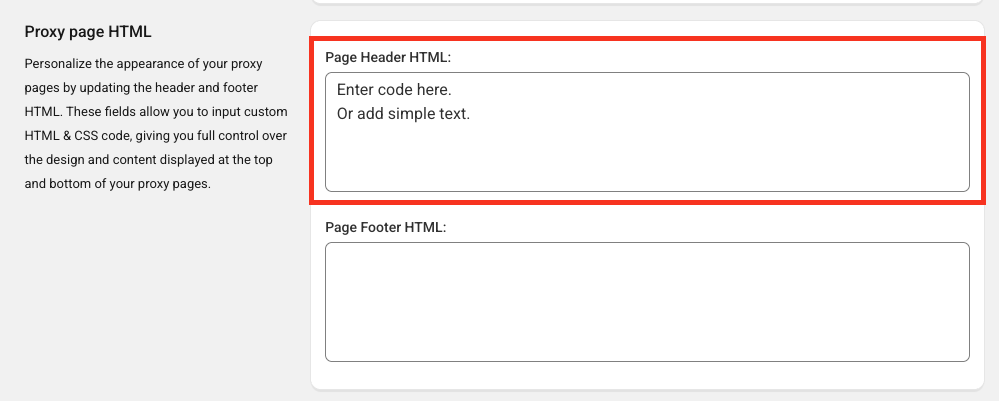
2. Scroll down until you find the Proxy Page HTML section.
3. Add your custom CSS code into the Page Header HTML field.
4. Save changes.
5. Select Save.
Important Note
Adding plain text or HTML to the Page Header will display the content above your map; adding plain text or HTML to the Page Footer will display the content below your map.
Contact Us
- Reach out to our Support Staff, or use our live chat if you have any obstacles.
- Schedule a call with an expert to help you set up or customize the app.
Was this article helpful?
That’s Great!
Thank you for your feedback
Sorry! We couldn't be helpful
Thank you for your feedback
Feedback sent
We appreciate your effort and will try to fix the article